My DIY FPGA board can run Quake II (part 3)
22-Mar-2026
- Part 1/6: Introduction
- Part 2/6: First prototype
- Part 3/6: Now it mostly works (you are here)
- Part 4/6: Next generation
- Part 5/6: One more iteration
- Part 6/6: Optimizing hardware to run Quake II
Second attempt
Key changes:
- I scaled back to a single RAM chip. With only one, the odds of a successful result were much higher.
- I placed the FPGA and the RAM on opposite sides of the board. This allowed for significantly shorter traces – a trick I picked up from WangXuan95. I also borrowed his DDR1 controller from GitHub (though I eventually ended up rewriting most of it).
- Since the standalone programmer was already proven to work, I integrated it directly onto the main board. Having everything on one PCB is more convenient.
- It turns out the 10M50SAE144 only has a single PLL, which is nowhere near enough. I needed a
pixel_clockandbit_clockfor the video interface, 48 MHz for the USB, two 90° phase-shifted clocks for the memory controller, and a CPU clock (the frequency of which was still TBD). To solve this, I added two Si5351A chips – I2C-programmable clock generators. - I redesigned the sound output, aiming for 12-bit stereo at up to 44.1 kHz with software-controlled volume.
- I repositioned the HDMI port and double-checked that the selected pins actually supported DDR IO.
- Power button! The first prototype was a bit inconvenient to use without one.
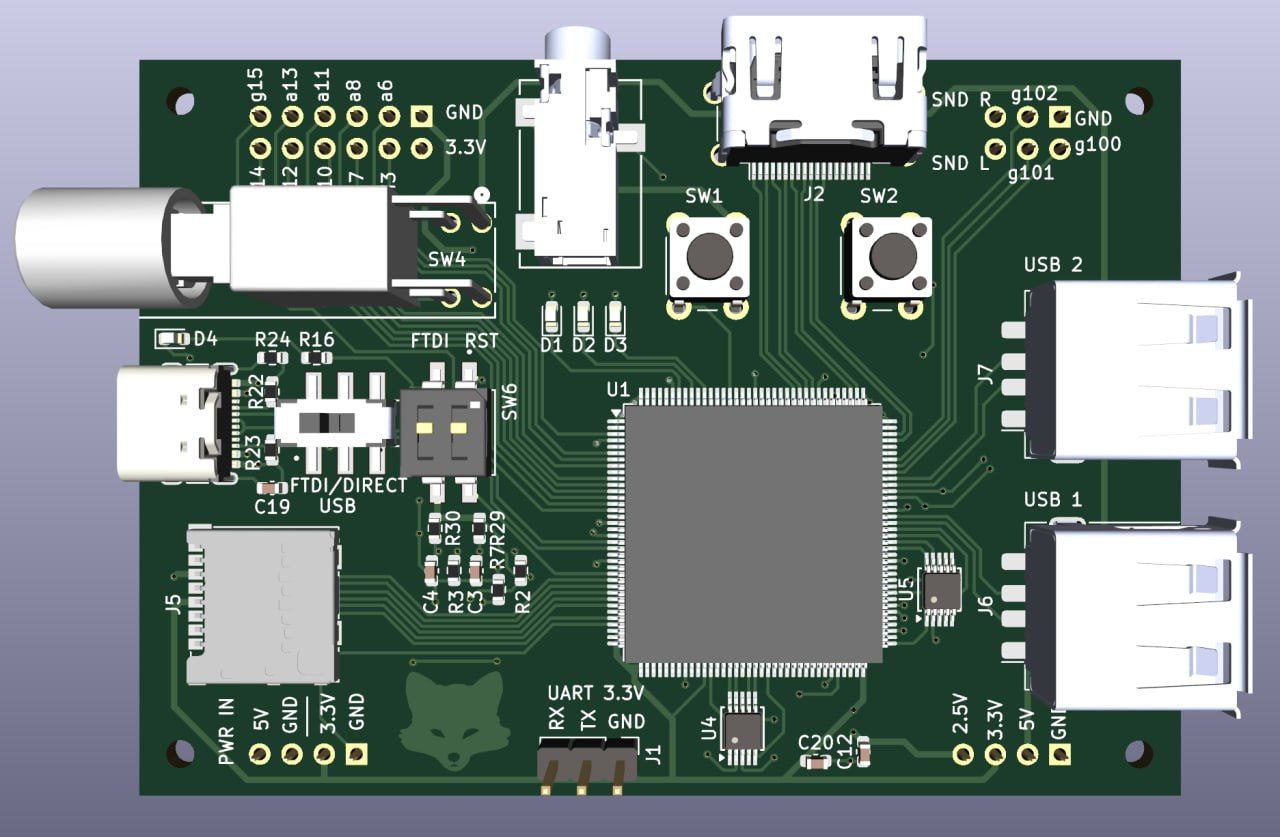 Top view, 3d model in KiCad
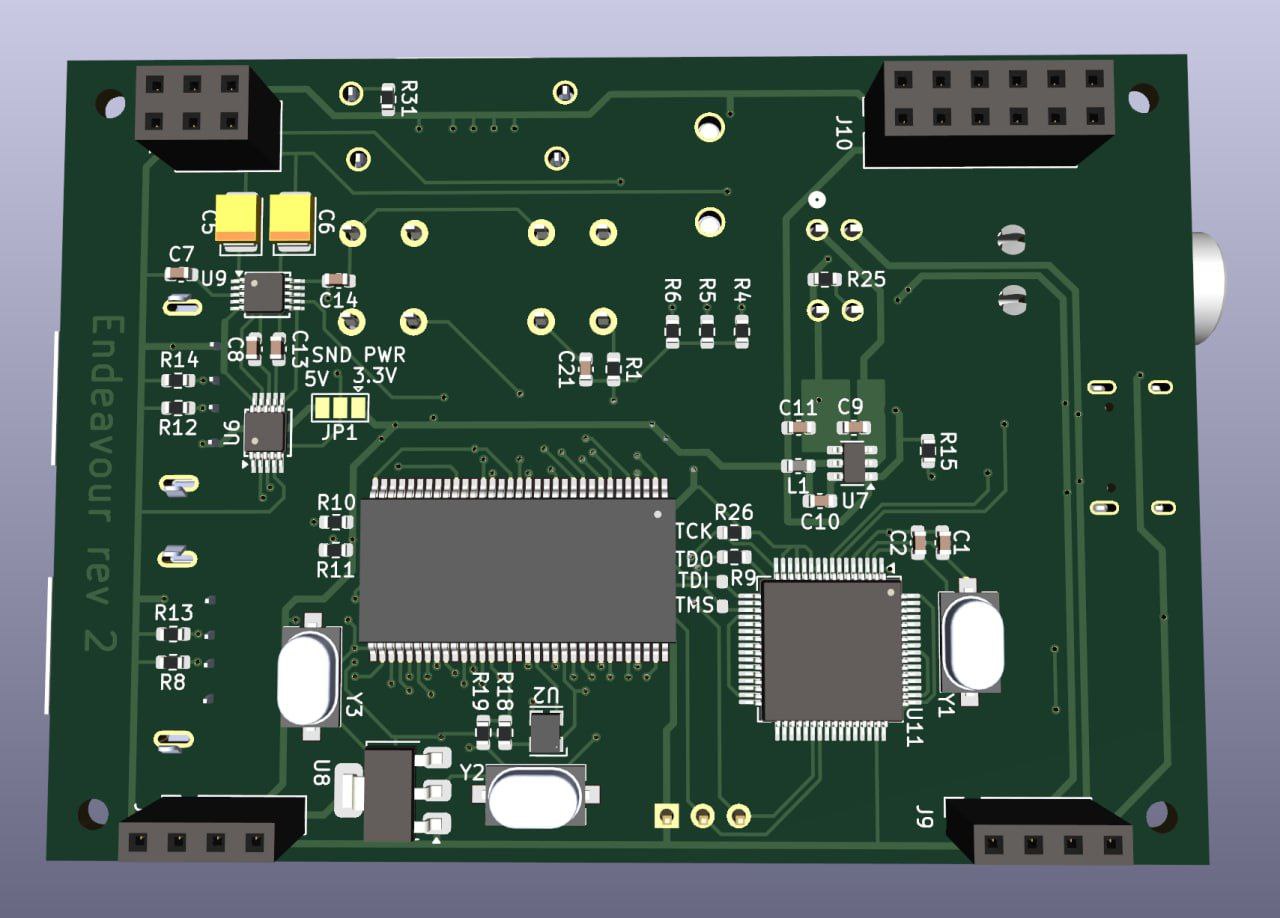 Bottom view, 3d model in KiCad
By this point, I had gained enough experience not to run into any unfixable issues – though many would say my soldering is still far from perfect.
 Top view
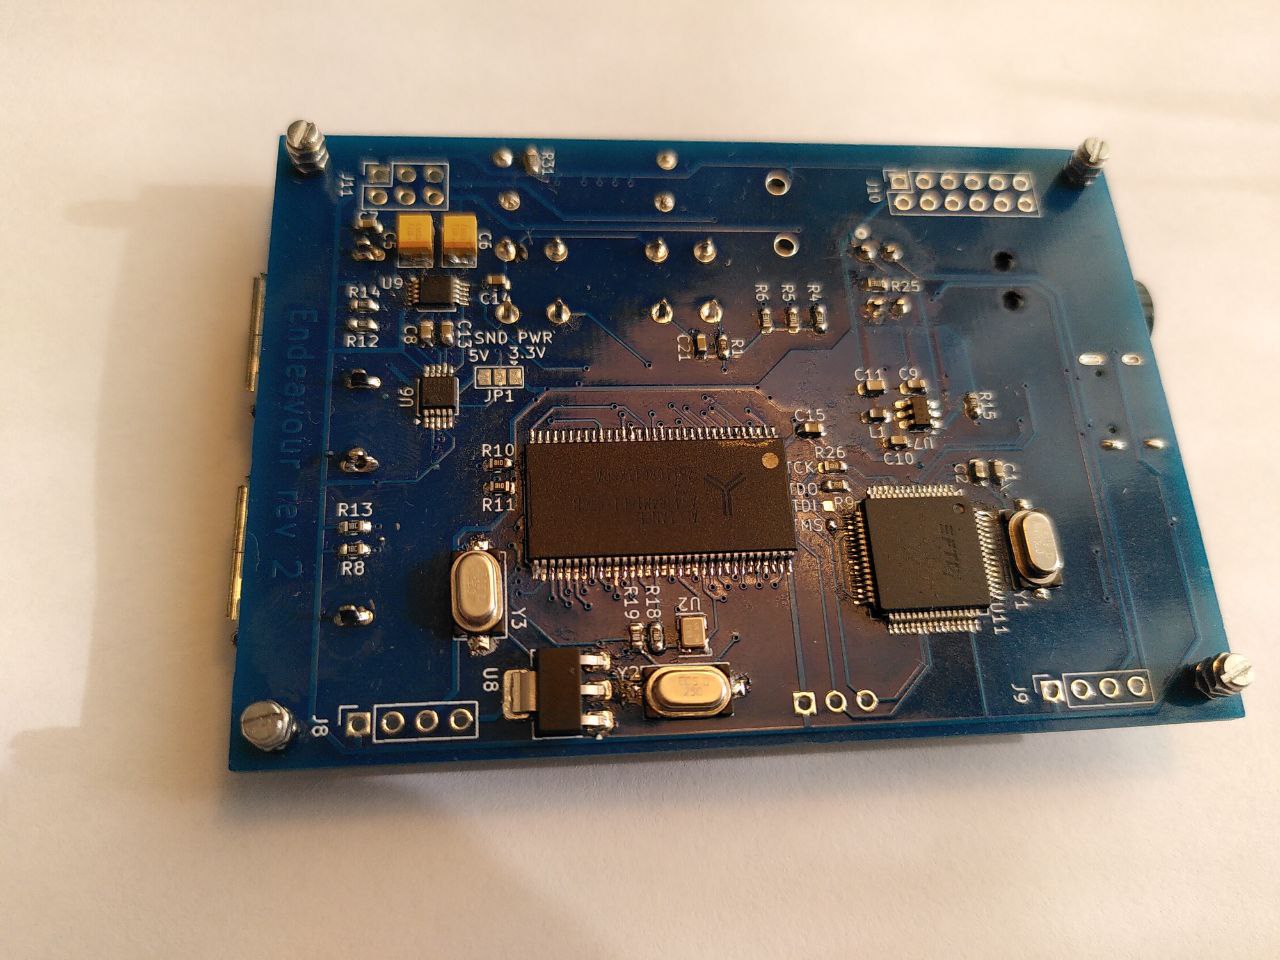 Bottom view
What followed were months of meditating on green lines in gtkwave, repeatedly re-reading the datasheet of the DDR1 chip, and diving into the USB protocol. I spent a significant amount of time trying to figure out why the OHCI implementation from the SpinalHDL repository wasn’t working (it turned out I was incorrectly handling unaligned access in my memory controller). In the later stages the list included adding debug printk statements throughout the Linux kernel.
During this process, I migrated my modules from the AXI4 bus to TileLink and migrated from VexRiscv to the higher-performance VexiiRiscv.
I spent three months chasing a deadlock that occurred whenever I tried to run gcc on my device. To find it, I had to shrink the entire system down to a 40MB initrd image, create a stripped-down testbench without peripherals, and reproduce the bug in Verilator. Each simulation of the minimal Linux boot took 11 hours. It turned out to be an actual bug in VexiiRiscv; after I sent the trace dump to Dolu1990, he committed a one-line fix within thirty minutes.
I won’t go into full detail now, or I’ll never finish this article. But in the end, almost everything worked. My single-core CPU, running at 60 MHz, took about ten seconds to compile a simple “Hello World” – but it was still incredibly cool!
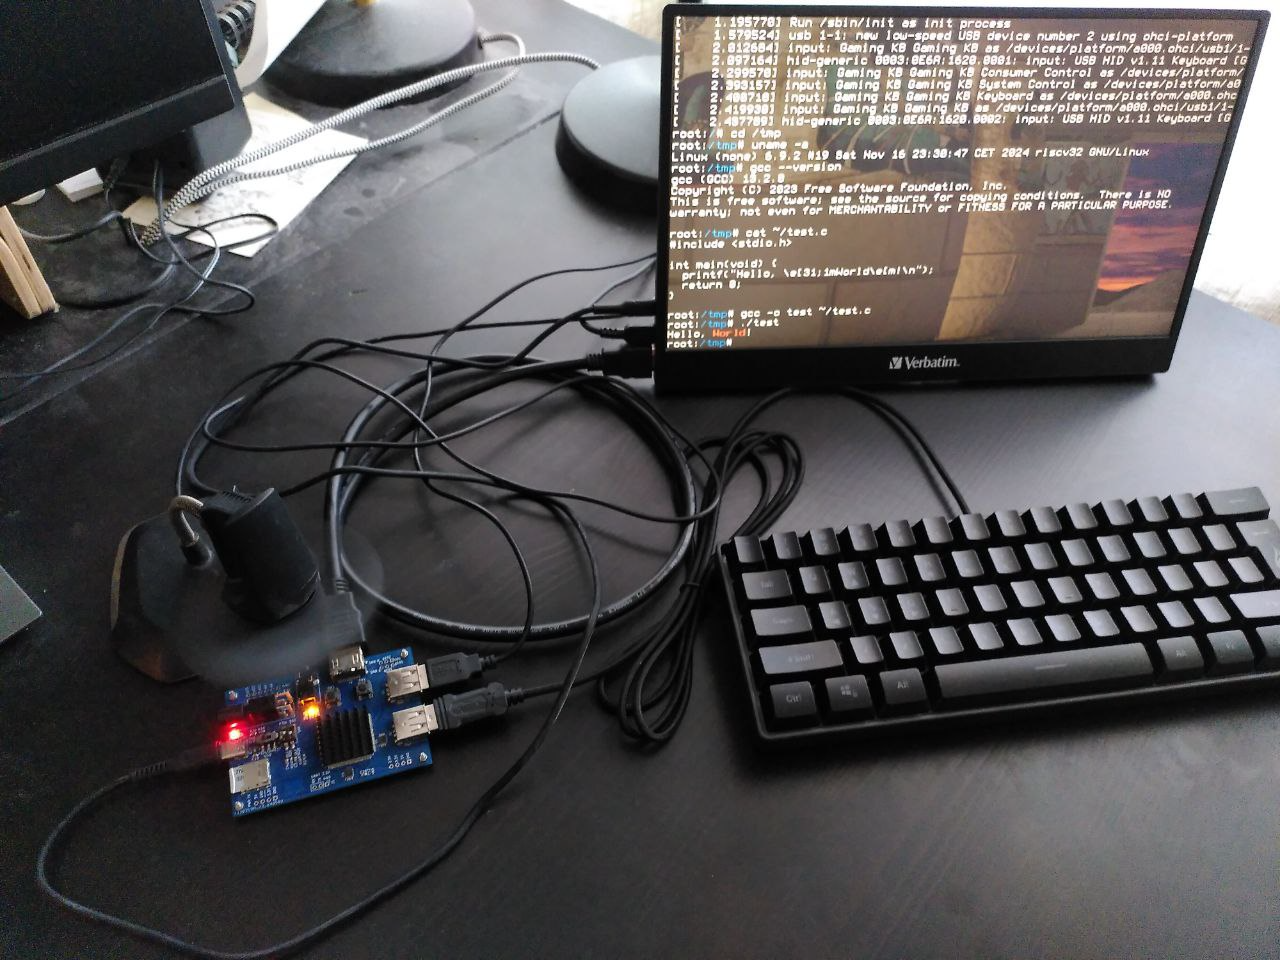
Almost everything worked, with a few notable exceptions:
- Power instability: Hotplugging USB keyboard often caused the board to reboot.
- Video artifacts: At maximum resolution (which for this board was 1280x720), nasty green artifacts would appear on the screen. I suspect the I/O ports couldn’t provide enough drive strength at 742 MHz. Or perhaps it was just due to power rail noise.
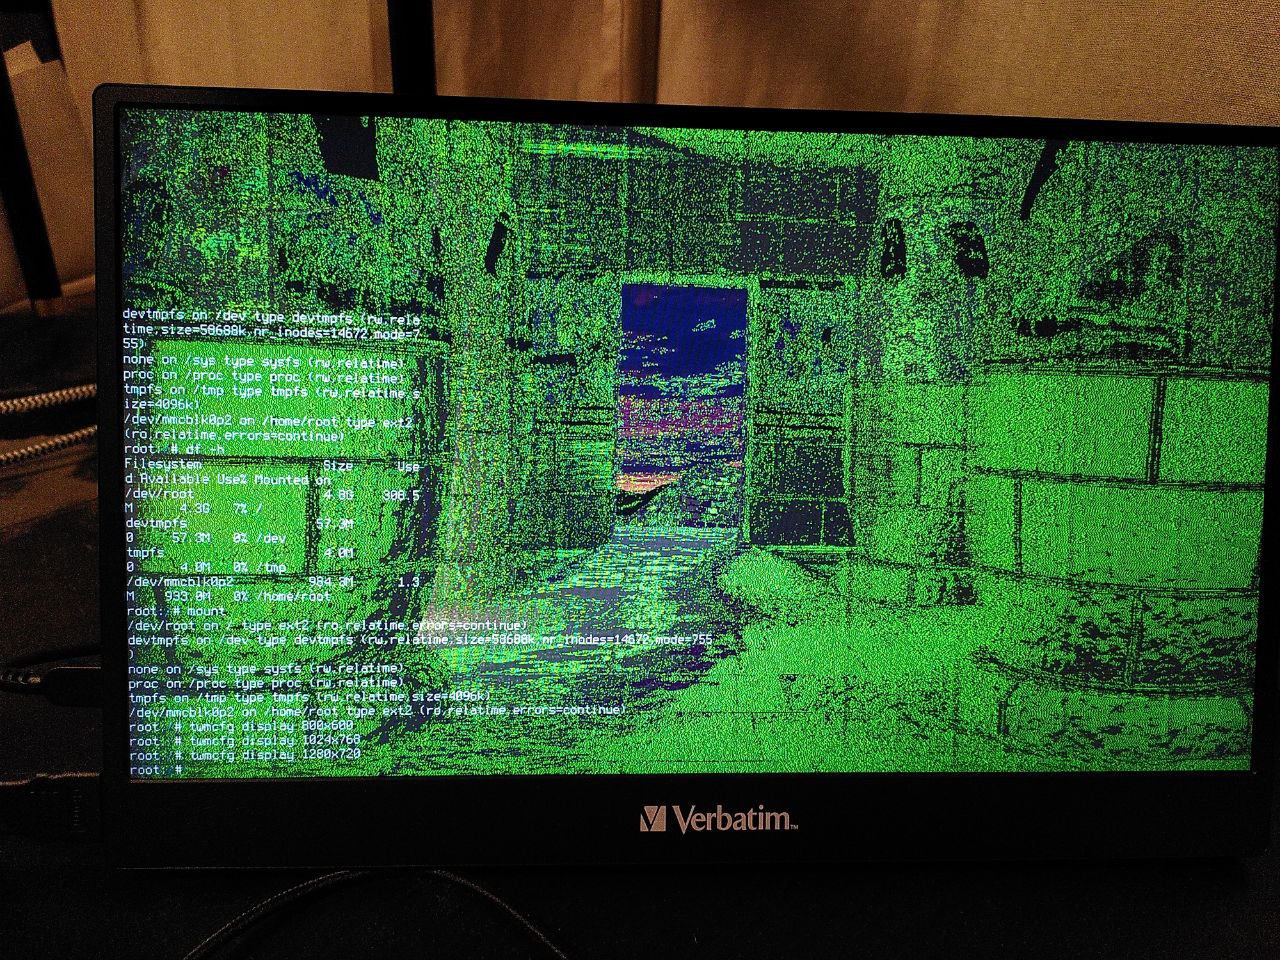 Video artifacts at 1280x720
The biggest issue was that after six months, the board simply died. Memtest started failing consistently. I suspect the RAM fried because I didn’t pay enough attention to the decoupling capacitors on the power rails. I tried to save it by swapping the RAM chip with the last one I had in stock; the memory started working again, but the heat from the air gun seemingly damaged the FPGA, and the video output stopped working.
Next part: Next generation (4/6)